- Concrete Walkways and Sidewalks
- Concrete Walkway Pictures
- Decorative Finishes for Existing Walkways
- Fix and Color Existing Concrete Walkways
- Sidewalk Repair - Resurfacing Concrete Walkways
- Design Ideas for Concrete Walkways
- 10 Ideas for Concrete Entryways
- Stairs and Steps
- Stamped Concrete Walkways
- Concrete Garden Bridges
- Front Porch Designs and Ideas
- Installing and Maintaining Concrete Walkways
- Concrete Walkway Cost
- Building Tips for Concrete Sidewalks & Walkways
- Sealing and Protecting Walkways & Sidewalks
- Sidewalk Pavers
- Other Resources
- Concrete Contractors: Find Products and Suppliers
Adding the Look of Stone and Brick to an Existing Concrete Walkway
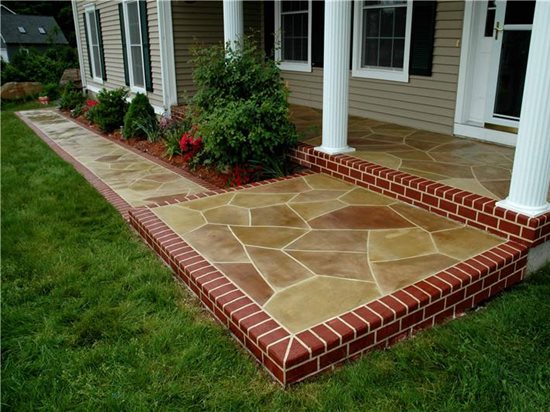
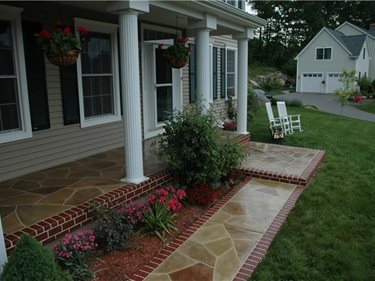
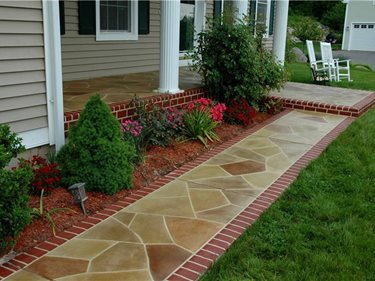
One of the neat things about concrete is that if you already have some in its plain, gray state, you can always spruce it up with unique colors and design. Having already done some concrete work in the backyard for the homeowners of this project, Don Pinger, owner of Custom Concrete Solutions was asked to enhance the front walkway and entry of the home. "The clients came to my showroom to look at samples. They chose this stone pattern combined with the brick border," says Pinger.
The existing walkway was already in great shape, Pinger explains. So to begin, he power washed the surface to prep it for coloring. Then, using Elite Crete's Thin Finish polymer cement integrally colored with Elite Crete's desert beige, Pinger skimcoated two coats over the surface. "This base coat," Pinger says, "becomes the grout color between the stone pattern."
Project Details:
Project time involved:
- Taping: Two full days with two people taping
- Coloring Bricks: Four hours with three people coloring
- Coloring Stones: Three hours of troweling, with five hours of staining
Project size:500 square feet
Project cost:$8 square foot
Rather than use a stencil for the pattern, Pinger has found that a better technique is to hand-tape the pattern. "We use ½-inch strapping tape to create the pattern for the stones and the bricks," says Pinger. "We've found that you can't trowel over a stencil, so we use the tape and put it down real hard so nothing goes under it."
Once the stones and bricks were taped off, Pinger hand-stained each stone with a brush using varying colors. "I started with Elite Crete's desert beige in a darker intensity for the stones. Then we come back over the stones by hand with various colors for a more natural look." Most of the stones were done in Elite Crete's chocolate stain. Pinger says, "we pigment the acrylic emulsion in varying shades of chocolate. Then we do some stones in desert beige, some a combo of chocolate and brick color. We take a little of each color and sponge it on the other colors to give the stones a more realistic coloring effect." For the brick border, Pinger integrally colored the overlay with a high concentration of brick for a strong, red color.
When the coloring was complete, the tape was removed, revealing clean, crisp grout lines. Pinger sealed the walkway with two coats of Elite Crete's solvent-based acrylic sealer (CSS). "This sealer is good for outdoor use," he explains. "You need to use an acrylic solvent-based sealer...it's more durable than water-based."
Custom Concrete Solutions
West Hartford, CT 06107
Submit Your Own Project Photos
Read More About Concrete Walkways
Return to Concrete Walkway Projects


